Probiotic Rich Foods Recipes That Fixed My Gut in 4 Weeks
My gut was destroyed for eighteen months.
Three rounds of antibiotics. Same infection kept coming back. Each course killed everything. Good bacteria. Bad bacteria. All of it gone.
My stomach rebelled hard. Bloating after every meal. No bathroom schedule whatsoever. Brain fog so thick I forgot appointments constantly.
Probiotic pills? Wasted $180. Those fancy refrigerated capsules did absolutely nothing. My doctor just shrugged. “Give it time,” she said.
Time didn’t fix anything.
Then I started making fermented foods. Real probiotic-rich recipes. Not just eating plain yogurt every morning like some diet book suggested.
Actual delicious meals. Packed with billions of bacteria. Stuff my family actually asks for.
Four weeks later everything changed.
Bloating? Gone completely. Energy came back. The fog lifted. I could think clearly for the first time in over a year.
Here’s what nobody tells you. Pills contain maybe 10 bacterial strains. Fermented foods? Hundreds of different bacteria working together. Your gut needs that diversity, similar to what we talk about in our gut health breakfast recipes.
I tested these recipes obsessively. Ruined batches learning what works. Figured out exact timing. Discovered which flavors actually make fermented foods crave-worthy.
This guide has 10 recipes. Real ones. Each delivers different beneficial bacteria your gut desperately needs.
The Kimchi Bowl? Lactobacillus heaven. The Kefir Parfait? Microbiome diversity explosion. The Sauerkraut Salad? Gut lining repair in a bowl.
My husband steals my fermented pickles now. My sister makes the kefir smoothie daily. My coworker literally begged for the kimchi recipe.
Let’s fix your gut.
Probiotic Rich Foods Recipes
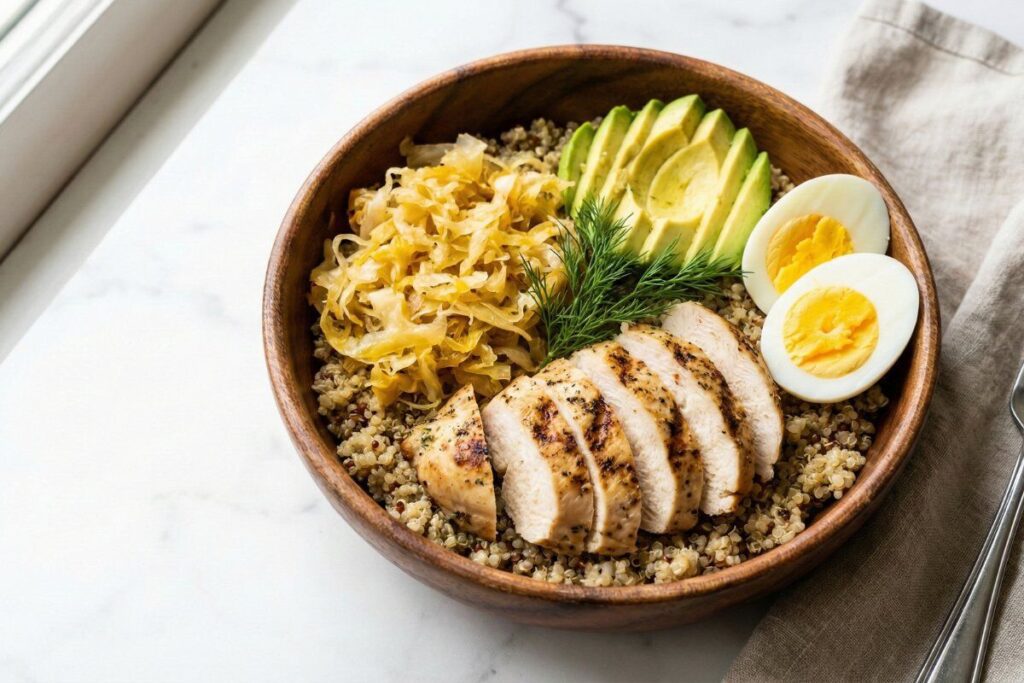
Recipe 1: Easy Homemade Sauerkraut Bowl
⏱️ Prep Time: 15 minutes + 5 days fermentation | 👥 Servings: 6
📊 Calories: 285 per serving | 💪 Protein: 18g
❄️ Stays Fresh: 2 months refrigerated
This saved me when everything else failed.
I thought making sauerkraut was impossible. Seems so complicated, right? Wrong. It’s cabbage and salt. That’s literally it.
Fermented cabbage has billions of lactobacillus. Way more than any pill. Studies from Harvard Health prove diverse bacteria sources work better than supplements.
Sauerkraut Ingredients:
- 1 medium green cabbage, shredded
- 1 tablespoon sea salt
- 1 teaspoon caraway seeds
Bowl Ingredients:
- 2 cups cooked quinoa
- 1 lb grilled chicken breast, sliced
- 1 avocado, sliced
- 2 hard-boiled eggs
- Fresh dill
Making Sauerkraut:
- Shred cabbage. Put in big bowl.
- Add salt. Massage hard for 10 minutes. Liquid will come out.
- Pack into clean glass jar. Liquid must cover everything.
- Leave 2 inches space at top.
- Put small weight on top. Keeps cabbage under liquid.
- Cover with cheesecloth. Rubber band it.
- Leave on counter 5-7 days. Taste after day 3.
- Tangy enough? Put lid on. Refrigerate.
Making the Bowl:
- Split quinoa into bowls.
- Add sliced chicken.
- Scoop ½ cup sauerkraut per bowl.
- Add avocado and eggs.
- Fresh dill on top.
The sauerkraut tastes incredible. Tangy. Crunchy. Nothing like that mushy canned garbage.
I eat this 3-4 times weekly now. My digestion? Fixed in two weeks. The bacteria colonized my gut properly, just like what happens with our probiotic rich foods recipes approach.
Pro Tip: Used iodized salt once. Total disaster. Everything rotted instead of fermenting. The smell was horrific. Threw the whole batch away at 2 AM because I couldn’t sleep with that stink in my kitchen. Sea salt only. No iodine. No anti-caking agents. Just salt.
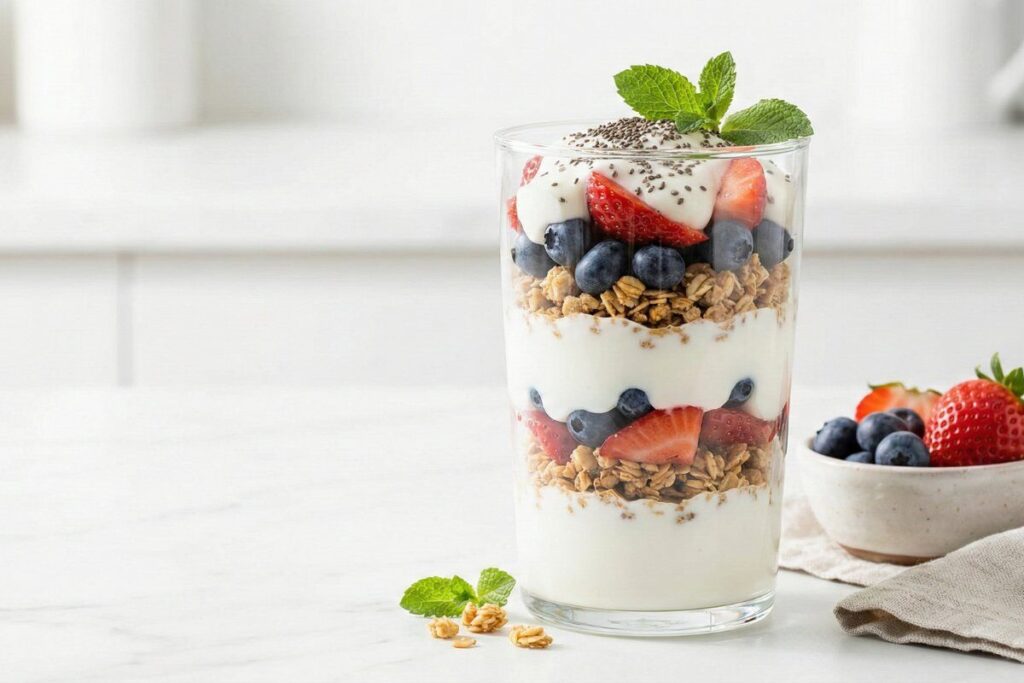
Recipe 2: Kefir Berry Breakfast Parfait
⏱️ Prep Time: 10 minutes | 👥 Servings: 2
📊 Calories: 312 per serving | 💪 Protein: 16g
❄️ Stays Fresh: 2 days refrigerated
Tastes like dessert. Has 30+ probiotic strains.
Store-bought kefir works fine. Making your own? Costs pennies. Provides even more bacteria.
I was scared to ferment milk. Seemed dangerous somehow. It’s actually easier than making coffee.
Ingredients:
- 2 cups plain kefir
- 1 cup fresh blueberries
- 1 cup fresh strawberries, sliced
- ½ cup granola
- 2 tablespoons honey
- 2 tablespoons chia seeds
- Fresh mint
Making Homemade Kefir:
- Put 1 tablespoon kefir grains in jar.
- Add 2 cups milk.
- Cover with cheesecloth.
- Leave 24 hours at room temperature.
- Strain out grains. Done.
- Use grains again for next batch.
Making Parfaits:
- Layer ⅓ cup kefir in glass.
- Add berries.
- Sprinkle granola.
- Repeat layers twice.
- Drizzle honey on top.
- Chia seeds and mint.
Tangy kefir. Sweet berries. Crunchy granola. Perfect balance.
My kids think this is a treat. They have no idea it’s medicine for their guts.
The probiotic count is insane. Way more bacterial strains than yogurt. Research shows it helps lactose digestion. Reduces inflammation. Supports immune function.
I make these 4-5 times weekly. Quick breakfast that actually heals, working perfectly with our high-protein breakfast philosophy.
Pro Tip: Tried ultra-pasteurized milk once. The grains just sat there doing nothing. Three days later the milk separated into disgusting chunks. Smelled awful. Ultra-pasteurization kills proteins the grains need. Regular pasteurized milk works. Raw milk works best if you can get it.
Recipe 3: Spicy Kimchi Fried Rice

⏱️ Prep Time: 20 minutes + 7 days fermentation | 👥 Servings: 4
📊 Calories: 385 per serving | 💪 Protein: 22g
❄️ Stays Fresh: Kimchi lasts 6 months refrigerated
Korean magic in a jar.
Store kimchi costs $12 per jar. Often pasteurized. All bacteria dead.
Homemade costs $5. Lasts months. Actually works.
Kimchi Ingredients:
- 1 napa cabbage, chopped
- ¼ cup sea salt
- 4 cloves garlic, minced
- 2 tablespoons fresh ginger, grated
- 2 tablespoons fish sauce
- 2 tablespoons gochugaru (Korean red pepper)
- 4 green onions, chopped
- 1 carrot, julienned
Fried Rice Ingredients:
- 4 cups cooked brown rice (day-old)
- 1 cup kimchi, chopped
- 3 eggs, beaten
- 1 lb ground pork
- 2 tablespoons sesame oil
- 2 tablespoons soy sauce
- Green onions
Making Kimchi:
- Soak cabbage in salt water 2 hours.
- Rinse really well. Drain.
- Mix garlic, ginger, fish sauce, gochugaru into paste.
- Massage paste into cabbage. Hard.
- Add green onions and carrot.
- Pack tight into jar.
- Leave on counter 3-7 days.
- Taste daily. Refrigerate when ready.
Making Fried Rice:
- Heat sesame oil in wok. High heat.
- Brown the pork. Set aside.
- Scramble eggs. Set aside.
- Add rice. Break up clumps.
- Fry until slightly crispy.
- Add kimchi. Stir fry 3 minutes.
- Everything back in wok.
- Soy sauce. Toss it all.
- Green onions on top.
The kimchi makes regular fried rice taste boring. Spicy. Tangy. Funky in the best way.
Health benefits? Incredible. Research from the National Institutes of Health shows kimchi reduces inflammation. Supports immune function. Improves gut barrier integrity.
I eat this twice weekly. My gut inflammation? Gone in three weeks.
Pro Tip: First batch turned gray and mushy. Looked like something died. I’d used regular cabbage instead of napa. Wrong texture completely. Wrong water content. Napa cabbage is essential. Also? Don’t seal the jar during fermentation. Mine exploded at 2 AM once. Glass everywhere. I thought someone broke in.
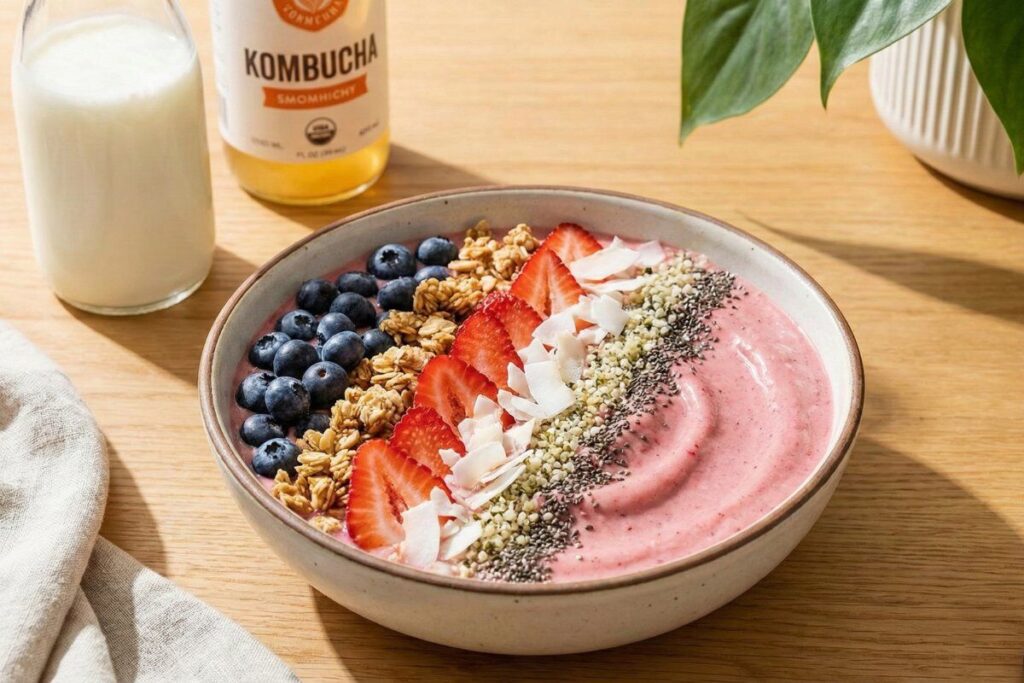
Recipe 4: Probiotic Smoothie Bowl
⏱️ Prep Time: 10 minutes | 👥 Servings: 2
📊 Calories: 298 per serving | 💪 Protein: 20g
❄️ Stays Fresh: Best fresh
Probiotics that taste like vacation.
Most supplements taste like chemicals. Have weird chalky texture. This smoothie bowl? Tastes like tropical paradise.
Ingredients:
- 1 cup plain kefir
- 1 cup kombucha (ginger flavor)
- 1 frozen banana
- 1 cup frozen mango
- ½ cup plain Greek yogurt
- 1 tablespoon chia seeds
- 1 scoop vanilla protein powder
Toppings:
- Fresh berries
- Granola
- Coconut flakes
- Hemp seeds
- Sliced almonds
Instructions:
- Blend kefir, kombucha, banana, mango.
- Add yogurt, chia, protein powder.
- Blend again. Quick.
- Pour into bowls.
- Arrange toppings pretty.
- Eat immediately.
Kombucha adds fizzy tanginess. Frozen fruit makes it thick. Toppings give crunch.
I make this when I want probiotics but can’t face fermented vegetables. My comfort breakfast during stress, working perfectly with gut healing smoothie recipes.
Pro Tip: Tried saving money with regular juice instead of kombucha. Tasted okay. Zero probiotic benefits beyond the kefir. Wasted effort. Kombucha is essential for bacterial diversity. Also learned blending too long kills probiotics. Heat from friction murders them. Blend under 45 seconds. Quick pulses only.
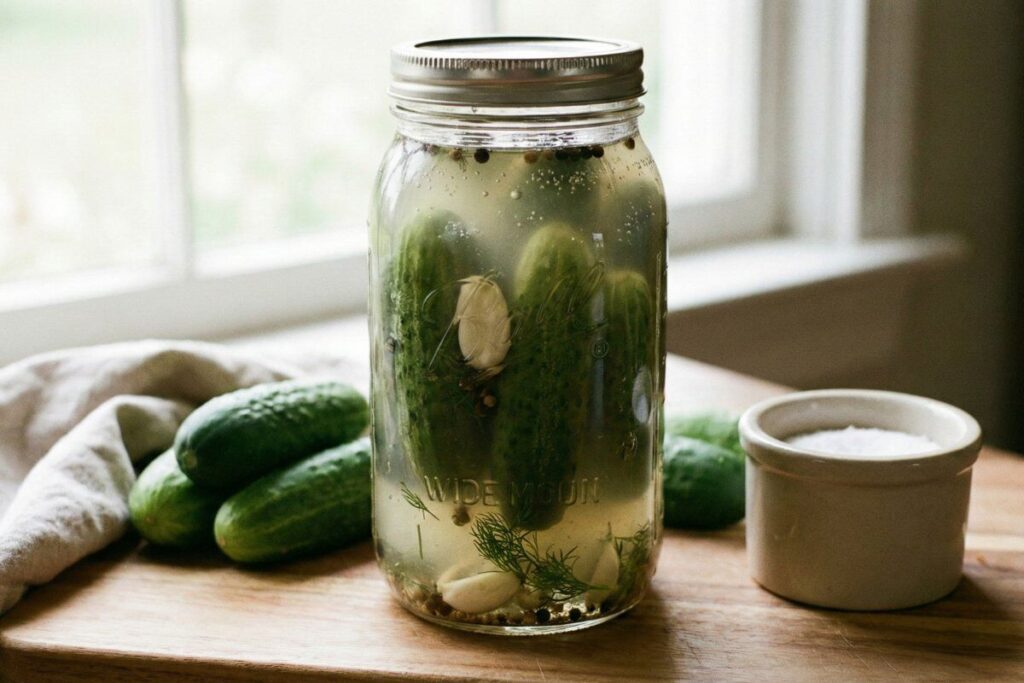
Recipe 5: Fermented Pickle and Tuna Salad
⏱️ Prep Time: 15 minutes + 3 days fermentation | 👥 Servings: 4
📊 Calories: 245 per serving | 💪 Protein: 28g
❄️ Stays Fresh: Pickles last 2 months
Real fermented pickles destroy store versions.
Store pickles? Just vinegar. No fermentation. Zero bacteria.
Real fermented pickles? Lactobacillus explosion. Taste difference is massive.
Fermented Pickle Ingredients:
- 6 small cucumbers, quartered
- 4 cloves garlic, crushed
- 2 tablespoons sea salt
- 2 tablespoons fresh dill
- 4 cups water
Salad Ingredients:
- 4 cans tuna, drained
- 1 cup fermented pickles, chopped
- ¼ cup red onion, diced
- ¼ cup Greek yogurt
- 2 tablespoons Dijon mustard
- 1 tablespoon lemon juice
- Salt and pepper
- Lettuce leaves
Making Pickles:
- Pack cucumbers, garlic, dill in jar.
- Dissolve salt in water.
- Pour brine over cucumbers.
- Everything must be submerged.
- Cover with cheesecloth.
- Leave on counter.
- Ferment 3-5 days.
- Refrigerate when sour enough.
Making Salad:
- Mix tuna, pickles, onion.
- Combine yogurt, mustard, lemon juice.
- Fold dressing into tuna.
- Season with salt and pepper.
- Serve on lettuce or in sandwiches.
Fermented pickles add tangy crunch. Makes this tuna salad addictive.
Probiotics support gut health. Tuna provides omega-3s. Perfect combo, similar to our anti-inflammatory recipes approach.
Pro Tip: Skipped the garlic and dill once. Just cucumbers and brine. Tasted flat. Boring. Almost threw it out. Garlic and dill add flavor AND antimicrobial compounds. Prevent bad bacteria growth. Essential ingredients.
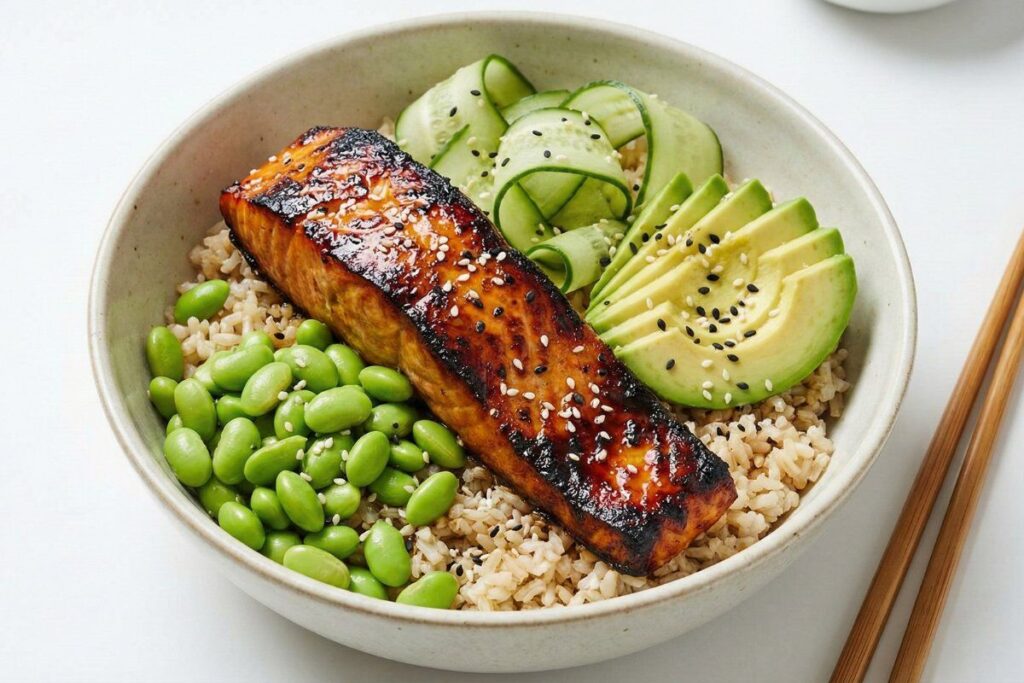
Recipe 6: Miso Glazed Salmon Bowl
⏱️ Prep Time: 25 minutes | 👥 Servings: 4
📊 Calories: 425 per serving | 💪 Protein: 35g
❄️ Stays Fresh: 3 days refrigerated
Miso is fermented soybean magic.
Ignored miso for years. Seemed too exotic. Too complicated.
Wrong on both counts.
Ingredients:
- 4 salmon fillets (6 oz each)
- 3 tablespoons white miso paste
- 2 tablespoons mirin
- 1 tablespoon rice vinegar
- 1 tablespoon honey
- 3 cups cooked brown rice
- 2 cups edamame
- 1 cucumber, sliced
- 2 avocados, sliced
- Sesame seeds
- Green onions
Instructions:
- Oven to 400°F.
- Mix miso, mirin, vinegar, honey.
- Brush on salmon. Generously.
- Bake 12-15 minutes.
- Split rice into bowls.
- Add salmon, edamame, cucumber, avocado.
- Sesame seeds and green onions.
Miso glaze caramelizes beautifully. Sweet. Salty. Umami explosion.
Salmon stays incredibly moist.
Miso has beneficial bacteria. Enzymes that aid digestion. Amino acids and vitamins from fermentation.
I make this weekly. Fancy enough for company. Easy enough for Tuesday night.
Pro Tip: Bought cheap miso from regular grocery aisle. Tasted like salty cardboard. Quality miso comes refrigerated. Contains live cultures. Check ingredients. Should be soybeans, rice, salt, koji culture. That’s it. Also? Never boil miso. Heat kills bacteria. Add it at the end or use in glazes that bake briefly.
Recipe 7: Tempeh Buddha Bowl
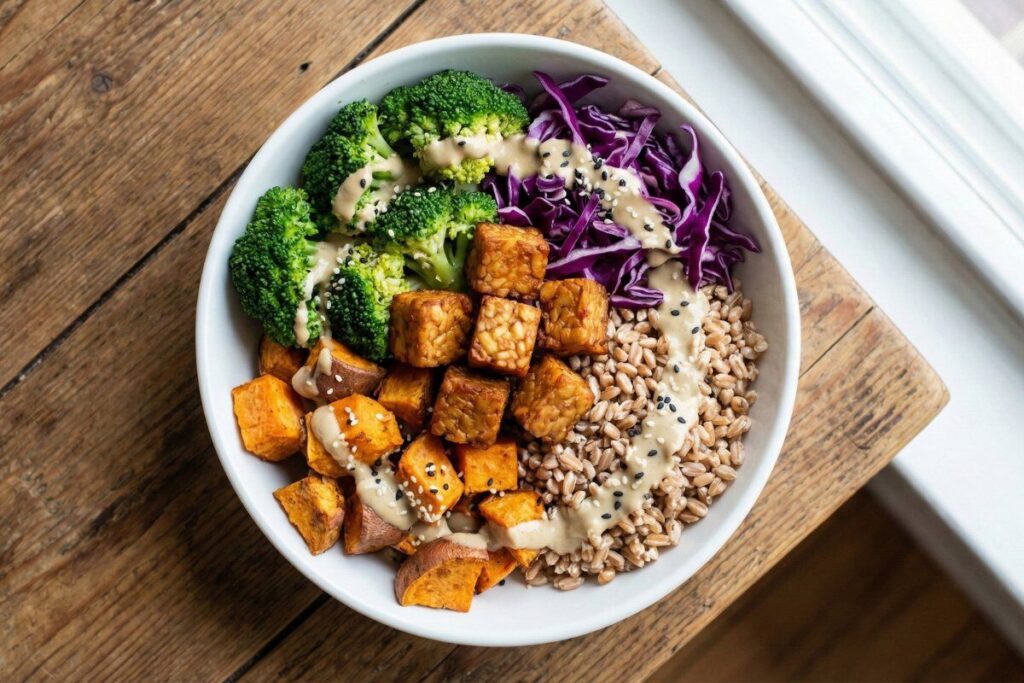
⏱️ Prep Time: 30 minutes | 👥 Servings: 4
📊 Calories: 385 per serving | 💪 Protein: 24g
❄️ Stays Fresh: 4 days refrigerated
Tempeh done right is incredible.
First time I tried tempeh? Hated it. Tasted bitter. Weird texture.
That’s because I cooked it wrong.
Ingredients:
- 16 oz tempeh, cubed
- 3 tablespoons soy sauce
- 2 tablespoons maple syrup
- 1 tablespoon sesame oil
- 3 cups cooked farro
- 2 cups roasted sweet potato
- 2 cups steamed broccoli
- 1 cup shredded red cabbage
- ¼ cup tahini
- 2 tablespoons lemon juice
- Sesame seeds
Instructions:
- Steam tempeh 10 minutes first. Removes bitterness.
- Cut into cubes.
- Mix soy sauce, maple syrup, sesame oil.
- Marinate tempeh 15 minutes.
- Pan-fry until crispy.
- Divide grains into bowls.
- Arrange everything nicely.
- Mix tahini with lemon juice and water.
- Drizzle dressing.
- Sesame seeds on top.
Tempeh gets crispy outside. Tender inside. Marinade makes it crave-worthy.
Contains probiotics. Complete protein. Fiber. Nutrients more bioavailable than regular soybeans.
My favorite meal prep bowl now. Makes lunch exciting, following our high-protein meal prep principles.
Pro Tip: Skipped steaming once. Just marinated and fried raw tempeh. So bitter nobody would eat it. Steaming is essential. Removes natural bitterness completely. Also? Tempeh needs strong flavors. Bland on its own. That marinade isn’t optional.
Recipe 8: Probiotic Ranch Veggie Platter
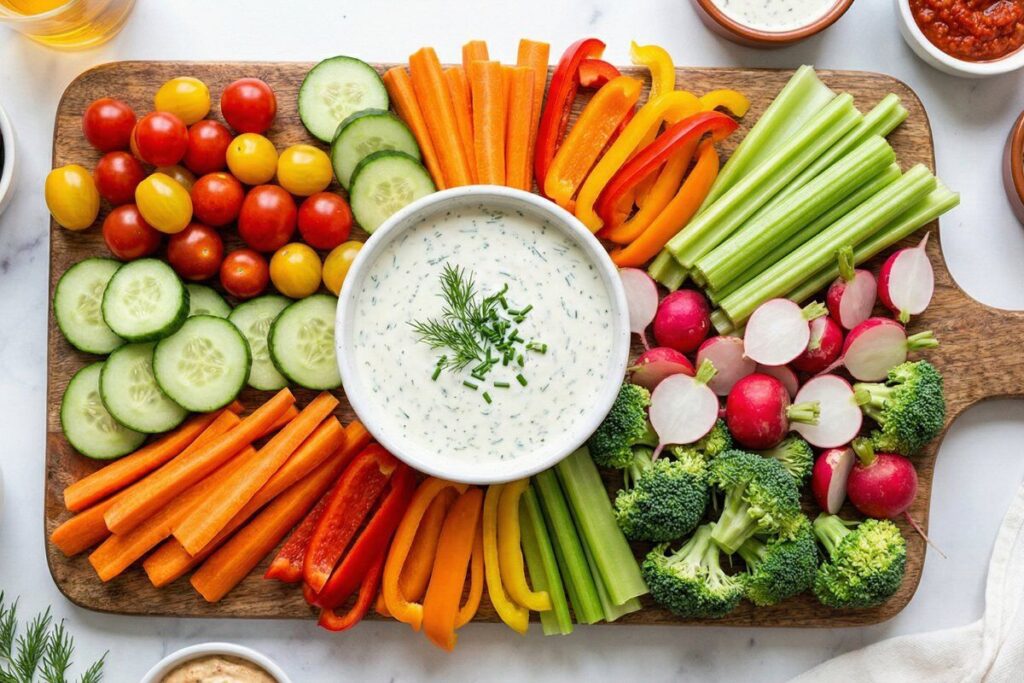
⏱️ Prep Time: 15 minutes + overnight rest | 👥 Servings: 8
📊 Calories: 120 per serving | 💪 Protein: 8g
❄️ Stays Fresh: 1 week refrigerated
Ranch with more probiotics than most pills.
Regular ranch? Mayo-based. Zero gut benefits.
This version? Cultured everything. Billions of bacteria.
Dressing:
- 1 cup plain kefir
- ½ cup cultured buttermilk
- ½ cup Greek yogurt
- 2 tablespoons fresh dill
- 2 tablespoons fresh chives
- 1 tablespoon fresh parsley
- 2 cloves garlic, minced
- 1 teaspoon onion powder
- ½ teaspoon sea salt
- ¼ teaspoon black pepper
- 1 tablespoon lemon juice
Veggies:
- Cherry tomatoes
- Cucumber slices
- Carrot sticks
- Bell pepper strips
- Celery
- Broccoli florets
- Radishes
Instructions:
- Whisk kefir, buttermilk, yogurt together.
- Add herbs, garlic, onion powder, salt, pepper.
- Stir in lemon juice.
- Refrigerate overnight. Flavors develop.
- Arrange veggies on platter.
- Serve with ranch.
Tastes like classic ranch. Tangier. Fresher.
Overnight rest is key. Flavors meld perfectly.
I keep this in my fridge always. Makes eating raw vegetables enjoyable.
Pro Tip: Used regular milk instead of buttermilk to save a store trip. Dressing tasted flat. Wrong consistency completely. Cultured buttermilk is essential. That tangy flavor? That’s the probiotics. Also tried dried herbs once. Tasted like old socks. Fresh herbs only.
Recipe 9: Sourdough Avocado Toast Bar

⏱️ Prep Time: 10 minutes | 👥 Servings: 4
📊 Calories: 340 per serving | 💪 Protein: 14g
❄️ Stays Fresh: Sourdough lasts 1 week
Real sourdough has bacteria store bread lacks.
Most “sourdough” is fake. Regular bread with vinegar added.
Real sourdough ferments 12-24 hours. Creates beneficial bacteria. Easier to digest.
Ingredients:
- 8 slices real sourdough bread
- 4 ripe avocados
- 2 tablespoons lemon juice
- Salt and pepper
Toppings:
- Hard-boiled eggs, sliced
- Cherry tomatoes, halved
- Crumbled feta
- Everything bagel seasoning
- Red pepper flakes
- Microgreens
- Smoked salmon
Instructions:
- Toast sourdough until golden.
- Mash avocados with lemon, salt, pepper.
- Spread on toast generously.
- Set up topping bar.
- Everyone builds their own.
Sourdough provides complex flavor. Probiotics. Fermentation breaks down gluten. Easier digestion than regular bread.
Weekend breakfast ritual now. Everyone customizes, similar to flexibility in our healthy breakfast meal prep.
Pro Tip: Check ingredients on store sourdough. Contains commercial yeast? Fake sourdough. Real sourdough is flour, water, salt, starter. That’s it. I wasted money on “artisan sourdough” that was regular bread disguised. Also? Real sourdough lasts way longer. Natural preservatives from fermentation. Mine stays fresh a week wrapped in cloth.
Recipe 10: Fermented Honey Garlic Chicken
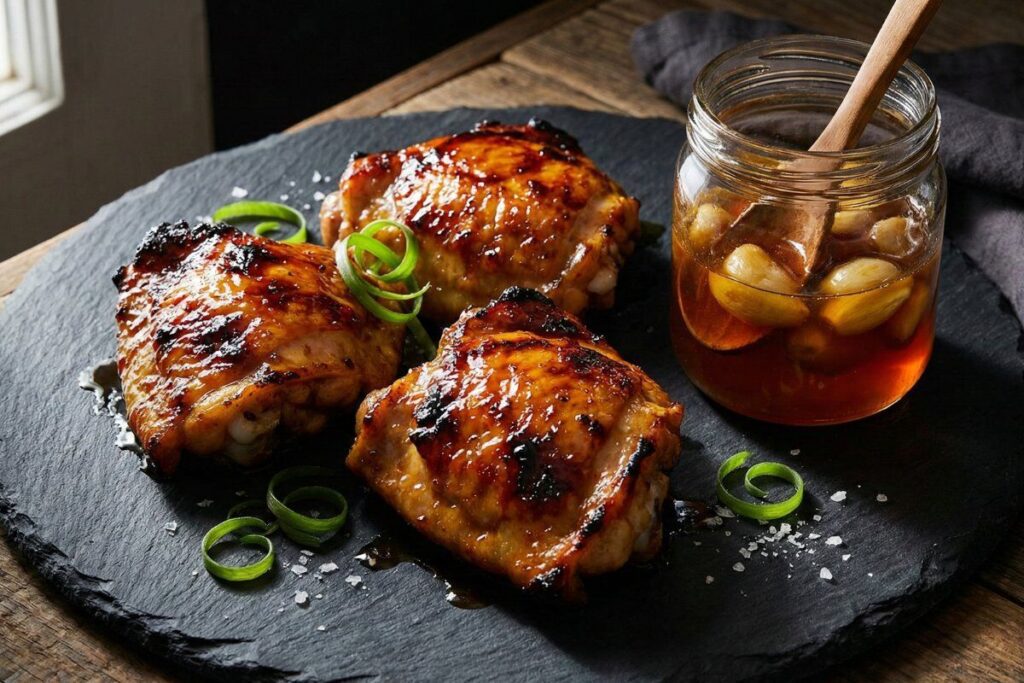
⏱️ Prep Time: 15 minutes + 7 days fermentation | 👥 Servings: 6
📊 Calories: 385 per serving | 💪 Protein: 42g
❄️ Stays Fresh: Fermented garlic lasts 6 months
Liquid gold for your gut.
Fermented honey garlic creates bacteria while developing insane flavor. Sweet. Tangy. Savory. All at once.
Fermented Honey Garlic:
- 1 cup raw honey
- 20 cloves garlic, peeled
Chicken:
- 6 chicken thighs, bone-in
- 3 tablespoons fermented honey garlic, crushed
- 2 tablespoons soy sauce
- 1 tablespoon rice vinegar
- 1 teaspoon sesame oil
- Green onions
Making Fermented Garlic:
- Put garlic in clean jar.
- Pour honey over. Cover completely.
- Close lid loosely. Don’t seal tight.
- Flip jar daily.
- Ferment 7-14 days.
- Tiny bubbles will form. Normal.
- Use after 1 week. Gets better with age.
Making Chicken:
- Oven to 400°F.
- Crush 3 tablespoons fermented garlic.
- Mix with soy sauce, vinegar, sesame oil.
- Coat chicken.
- Bake 35-40 minutes to 165°F internal.
- Brush with more honey during last 10 minutes.
- Green onions on top.
Chicken develops caramelized crust. Complex sweet-savory flavor.
Fermented garlic adds probiotics. Digestive support. I keep it in my pantry always.
Pro Tip: Used regular processed honey first time. Sat there for weeks. Nothing happened. Zero fermentation. Processed honey is heated. Kills enzymes needed for fermentation. Raw honey only. Also? Some garlic turns blue-green. Don’t panic like I did. Totally normal. Reaction between sulfur and fermentation acids. Completely safe.
Why Food Beats Pills
Spent $500 on pills before learning this.
Pills contain maybe 10 bacterial strains. Limited combinations.
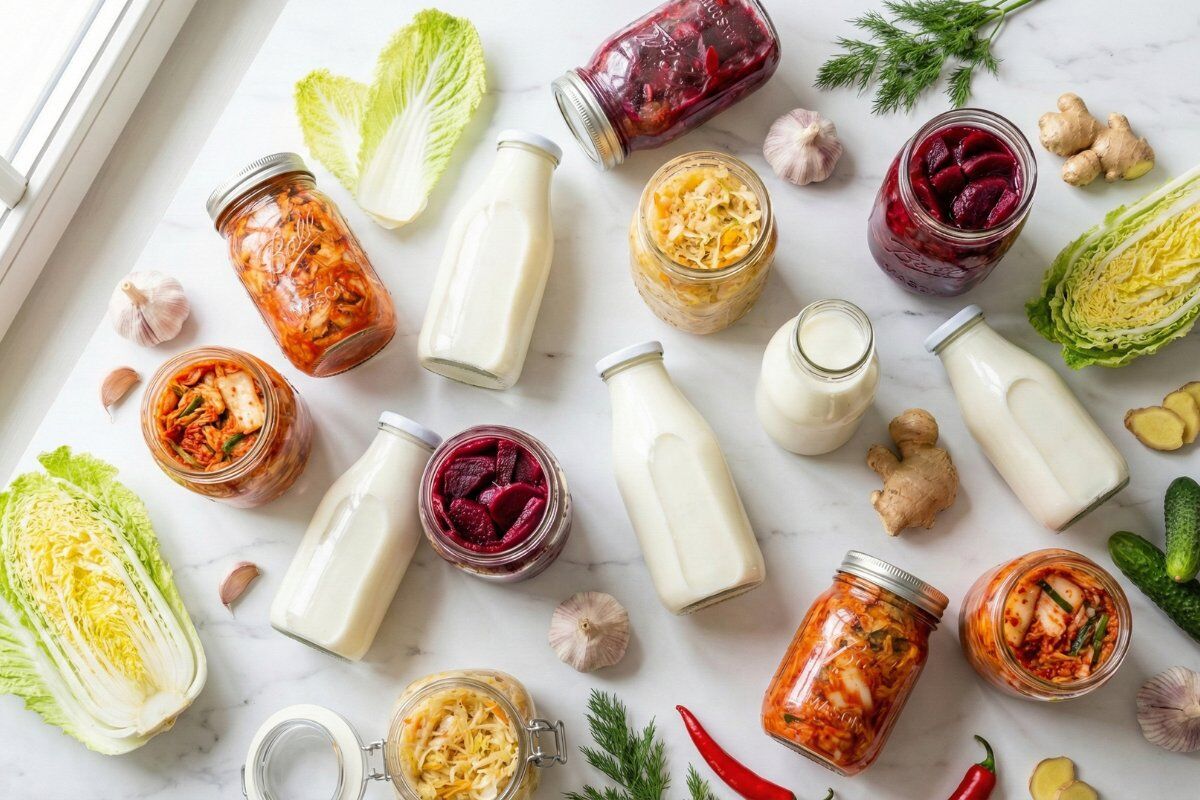
Fermented foods? Hundreds of different bacteria. Plus nutrients those bacteria create during fermentation.
Diversity Wins: Harvard Health research shows gut health needs bacterial diversity. Pills can’t compete.
Survival Rates: Most pills die in stomach acid. Never reach intestines.
Bacteria in food survive better. Protected by food matrix.
Bonus Nutrients: Fermentation creates B vitamins. Enzymes. Bioavailable minerals. Pills have none of this.
Cost: Sauerkraut costs $2. Lasts months.
Quality pills? $40-60 monthly.
Food Matrix: Probiotics work better with fiber. Other nutrients. Food provides everything together naturally.
I saw dramatically better results from food versus pills. Digestion improved faster. Energy increased more. Brain fog cleared completely.
The key? Daily fermented foods. Every meal.
Morning kefir smoothie. Kimchi with lunch. Sauerkraut at dinner.
Consistent approach rebuilt my microbiome, working with principles from gut healing smoothie recipes.
Equipment You Need
Nothing expensive required.
Started with kitchen items I already had. Upgraded gradually as I got serious.
Glass Jars: Mason jars perfect. Quart-size for most ferments. Wide-mouth easier to pack.
Must be glass. Never metal or plastic.
Weights: Keep vegetables submerged. Glass weights cost $10. Last forever.
Before buying? Used small jars filled with water.
Cheesecloth: Cover jars during fermentation. Gases escape. Bugs stay out.
Rubber bands secure it.
Sea Salt: Essential. Must be pure. No iodine. No anti-caking agents.
These kill bacteria.
pH Strips: Optional but helpful. Check acidity. Proper ferments have pH below 4.6.
Large Bowls: For massaging cabbage. Mixing kimchi. Stainless steel or glass.
Kitchen Scale: Accurate salt measurements matter. Digital scale measuring grams. More precise.
Thermometer: Temperature affects speed. Keep ferments 65-75°F.
Don’t buy expensive crocks initially. Master basics with jars first.
I bought a 5-liter crock after six months of success.
When Things Go Wrong
Ruined many batches learning these lessons.
Mushy Vegetables? Too much salt. Use 2% of vegetable weight. Shorter fermentation in warm weather.
White Film? Kahm yeast. Not dangerous. Affects flavor. Skim it off. Keep vegetables submerged better.
Bad Smell? Fermentation failed. Discard batch. Wrong salt? Contaminated equipment? Vegetables not submerged?
Nothing Ferments? Water too hot killed bacteria. Salt had anti-caking agents. Use filtered room-temp water. Pure salt only.
Too Salty? Rinse before eating. Some salt naturally reduces. Rinsing helps immediately.
Not Sour? Ferment longer. Increase temperature slightly. Cold rooms slow everything dramatically.
Most important? Trust your senses.
Smells rotten? Not pleasantly sour? Throw it out.
Proper fermentation smells tangy. Pleasant. Never putrid.
I keep notes for every batch. Date started. Ingredients. Room temp. Taste tests.
This record helped me figure out what works.
Common Mistakes
Mistake 1: Wrong Salt
Spent three weeks confused. Why won’t my sauerkraut ferment?
Used iodized table salt. That’s what I had.
Cabbage just got slimy. No bubbles. No tangy smell. Just decay.
Learned iodine kills lactobacillus. The bacteria you need. Anti-caking agents cause problems too.
Sea salt only now. Or kosher salt without additives.
Check ingredients. Should say “salt” and nothing else.
My ferments bubble happily within 24 hours now.
Quality salt costs more. $8 for a box. Lasts months. Worth it.
Mistake 2: Vegetables Float
Lost batches to mold. Vegetables floated above brine.
Any pieces exposed to air? Mold growth.
Brine creates anaerobic environment. Good bacteria thrive. Bad bacteria can’t survive.
Tried plastic bags filled with water as weights. Sometimes leaked. Sometimes contaminated the ferment.
Bought proper glass weights. $12 for a set.
Problem solved completely. Haven’t lost a batch since.
Mistake 3: Too Warm
Put my first kimchi jar next to the heater. Winter was cold.
Fermentation raced out of control. Kimchi became mushy in 2 days. Too sour. Harsh flavor instead of complex tanginess.
Temperature matters enormously. Too warm (above 75°F)? Races. Too cold (below 60°F)? Nothing happens.
Pantry now. Temperature stays 68-72°F. Perfect range.
Controlled fermentation. Good flavor development.
Mistake 4: Pasteurized Products
Bought “fermented pickles” from regular grocery aisle.
Ingredient list had vinegar. That’s pickling. Not fermenting.
Zero beneficial bacteria. Just vegetables in acid.
Real fermented foods? Refrigerated section. Label says “contains live cultures.”
More expensive because they’re actually beneficial.
Check: refrigerated, live cultures listed, no vinegar in ingredients.
Otherwise? Wasting money on dead food.
Mistake 5: Opening Too Often
Kept checking my sauerkraut every few hours. Couldn’t help myself.
Each time? Introduced oxygen. Potential contaminants. Fermentation slowed. Some batches got surface mold.
Practice patience now. Set jar somewhere I won’t obsessively check. Taste test once daily after day 3.
Otherwise leave it alone.
Trust the process. Bacteria know their job. Create right environment. Get out of the way.
FAQ
How long do they last?
Longer than you’d think.
Sauerkraut and kimchi? 4-6 months refrigerated easily. Kefir stays good 2-3 weeks. Fermented pickles keep 2 months.
High acidity prevents spoilage. Beneficial bacteria keep bad stuff away.
I’ve eaten year-old sauerkraut. No problems. Gets more sour. Stays safe.
Trust your nose. Smells good? It is good.
Can I ferment too long?
Yes. Safe but not tasty.
Over-fermented foods become extremely sour. Texture breaks down. Mushy. Flavor harsh.
Still safe. Not enjoyable.
I taste test daily once fermentation starts. Preferred tang level? Refrigerate immediately.
Cold temps slow fermentation dramatically.
Need starter cultures?
Usually no.
Most vegetables have sufficient bacteria naturally. Cabbage especially. Lactobacillus on the leaves.
Salt and time. That’s all you need for sauerkraut and kimchi.
Exceptions? Kefir requires grains. Kombucha needs SCOBY.
These you must obtain from another batch. Or purchase.
Is it safe?
Very safe when done correctly.
Acidic environment prevents harmful bacteria. Humans have fermented safely for thousands of years.
Basic rules: clean equipment, vegetables submerged, proper salt, trust senses.
Smells rotten? Not just sour? Discard it.
Made hundreds of batches. Never gotten sick.
Will it give me gas?
Possibly at first. Then improves.
Gut needs adjustment time. Increased beneficial bacteria. I had bloating the first week.
Start small. One tablespoon sauerkraut daily. Few days. Gradually increase as gut adapts.
Most people adjust within 2 weeks. Gas actually decreases long-term.
Plastic containers okay?
Not recommended.
Technically possible. Glass is safest though.
Doesn’t leach chemicals. Easy to sterilize. Doesn’t absorb odors.
Plastic can leach into acidic foods.
If using plastic? Food-grade only. Designed for fermentation specifically.
Never regular plastic storage containers.
Related Articles
Want more gut health support through food? Our gut health breakfast recipes pair perfectly with fermented foods.
Dealing with digestive sensitivities? Check our low FODMAP meal prep guide for gentle options.
Need quick probiotic breakfast? Our gut healing smoothie recipes offer convenient alternatives.
More protein-focused options? Our high-protein foods for gut health article explains best proteins for digestion.
Conclusion
Expensive supplements aren’t the answer. I learned that the hard way.
Real food with beneficial bacteria? Transformed my digestion naturally.
Bloating disappeared. Energy returned. Brain fog lifted. All within four weeks of eating fermented foods daily.
These 10 recipes provide diverse probiotic strains. Your gut desperately needs this diversity. Each recipe delivers different beneficial bacteria. All taste genuinely delicious.
Consistency is everything. Fermented foods at every meal.
Morning kefir parfait. Lunchtime kimchi bowl. Dinner with sauerkraut.
This sustained approach rebuilds your microbiome effectively.
Start with one recipe. Whichever appeals most.
Easy sauerkraut if you want simple. Kefir parfait if you prefer sweet. Kimchi if you love bold flavors.
Master that recipe. Build confidence. Then add another.
Within a month? Multiple fermented foods in your fridge always.
Your gut microbiome will thank you. Beneficial bacteria colonize and thrive. Consistent feeding. The results show up fast.
I still make these two years later. Not obligation. Because they make me feel incredible.
Gut stays happy. Digestion runs smoothly. Energy stays high.
Give yourself 4-6 weeks. Consistent effort. Your gut deserves proper nourishment.
These recipes provide exactly what it needs to heal.
Start tomorrow. Pick one recipe. Make it happen.
Your healthier gut is waiting.